
Secretele serei ingropate cu care poti produce legume si in miezul iernii. Costa 270 de euro si o poate construi orice gospodar
Ieftine și eficiente, serele subterane sau îngropate sunt o modalitate foarte bună pentru cultivatori de a produce legume pe tot parcursul anului și mai ales în lunile de iarnă. Cu o investiție de numai 250-270 de euro vă puteți construi o seră/solar de tipul Walipini (cuvânt indian pentru “loc cald”) care vă va permite să aveți o grădina plină cu legume proaspete chiar și de Crăciun.

Investiție destul de mică
Cel mai interesant aspect, potrivit Institutului Benson o organizaţie non-profit pentru agricultură sustenabilă care a creat chiar un manual despre funcționarea unei astfel de construcții, este faptul că modelul lor de seră Walipini (de şase metri pe 23 de metri), construit în La Paz, costă aproximativ 250-300 de dolari, adică până în 270 de euro. Prețul destul de mic este datorat forţei de muncă furnizate de proprietarii construcţiei şi utilizării de materiale ieftine, cum ar fi foliile de plastic care protejează împotriva razelor ultraviolete.
Principiul care stă la baza unei astfel de construcții este destul de simplu, căldura din timpul zilei este „stocată” astfel încât să fie păstrată o temperatură optimă și peste noapte. Astfel, o temperatură este menținută constant 24/24 iar legume precum salata, roșii, varza sau broccoli pot fi cultivate și în timpul iernii.
Cum se construiește
În primul rând se sapă o groapă rectangulară de circa 2,5 m adâncime. Rămâne la decizia cultivatorului cât de adâncă, lungă sau lată va fi construcția în funcție de cât de multe legume dorește să cultive. Un detaliu foarte important este poziţia soarelui astfel că se alege un loc cât mai luminat și unde soarele să bată tot timpul anului.
Un zid gros de pământ în partea din spate a construcţiei şi un perete mult mai mic în partea din faţă, furnizează unghiul necesar pentru acoperişul care poate fi din folie de plastic, sticlă sau în funcție de buget, policarbonat.
Tot în raport cu posibilitățile cultivatorului, pereții pot fi făcuți din piatră, pământ sau alte materiale naturale suficient de dense pentru a absorbi cantități mari de căldură.
Trebuie să se țină cont că peretele de nord al serei trebuie să fie mai înalt decât cel din sud, deoarece în felul acesta iarna o să fie captată toată căldura soarelui, iar vara, acesta va reflecta soarele.

Pereții trebuie să fie puțin înclinați iar interiorul ar trebui să arate în formă de \_/ , pentru a nu se dărâma. Înainte de a adăugă pământul fertil pe care practic vor crește plantele turnați minim 30 cm de pietriș pe toata baza serei. Acesta va avea rolul de a drena surplusul de apă din sera subterană.
Înfiltrarea apei în pereți sau în „podea” poate fi distructivă pentru seră deoarece zidurile se vor prăbuși iar umezeală din sol va afecta în mod negativ creșterea plantelor și mai ales va favoriza bolile la legume. De aceea, există precauţii care trebuie luate în considerare, în ceea ce priveşte hidroizolarea, drenajul şi ventilarea construcţiei, în timp ce este aliniată în mod corect la razele soarelui.
Folia care învelește acoperișul nu trebuie să fie subțire
Acoperişul sigilează practic groapa și permite razelor soarelui să pătrundă în interior, creând un mediu cald şi stabil necesar pentru creşterea plantelor. Atenție, dacă sera subterană este mult mai lată, atunci acoperișul trebuie gândit astfel încât să nu cedeze când e vânt mai puternic, ploaie torențială sau zăpadă. Nici folia nu trebuie să fie prea subțire astfel că este recomandat să alegeți varianta cea mai groasă pe care o găsiți pe piață.
De asemenea, deasupra, în jurul acoperișului, faceți șanturi micuțe și folosiți tuburi de plastic, sau chiar folie, pentru a crea șanțuri de drenaj. Făcând acest lucru veți proteja sera subterană de inundație.

Serele îngropate nu sunt utile numai iarna astfel că și în perioadele caniculare când temperatura atinge și 50 de grade iar plantele practic sunt sufocate de căldură sera păstrează mai rece, undeva la 30 de grade. Deci sera îngropată ține o constantă din cauza pământului, care acționează ca un tampon, absorbind căldura în exces și cedând-o înapoi când e prea rece afară, întocmai ca un calorifer.
Care sunt riscurile
Sunt esențiale adâncimea, orientarea față de soare și ventilația. În plus, trebuie să aveți o intrare bine protejată contra ploii. Aceasta pe timpul verii este folosită și pentru aerisire. Mai faceți încă o aerisire în cealalta parte a serei, pentru a avea o ventilație corespunzătoare pe timpul verii.
Iată un videoclip de prezentare a unei sere Walipini:
https://www.youtube.com/watch?v=O_esu0qnKZU
Sursa vide: youtube.com
Mai jos, un reportaj din Romania:
Sursa video: youtube.com
Sursa articol: expunere.com
Sursa originala: manancabio.ro
ADAUGĂ UN OU BĂTUT PESTE CARTOFII DAŢI PRIN RĂZĂTOARE. NU AI MÂNCAT NICIODATĂ CEVA MAI BUN
Australienii le numesc hash browns si sunt atat de delicioase incat toti cei care le-au incercat spun ca nu au mancat niciodata ceva mai bun.
Ingredientele necesare:
– 4 cartofi curătaţi de coajă;
– un ou bătut;
– 2 linguri lapte praf;
– 1/3 cană făină;
– o lingură sare;
– o linguriţă zahăr;
– piper;
– o linguriţă de unt;
– ulei pentru prăjeală.
Sursa video: youtube.com
Sursa articol: fazebune.com
Cum gătești paste în cel mai rapid mod? Privește ce economie de timp face această doamnă!
Foto: marthastewart.com
Atunci când nu știi ce să gătești, însă ai inițiativa și curajul de a încerca ceva nou, Perfect Ask îți vine în ajutor. Astăzi vom găti împreună cea mai rapidă rețetă de paste.
Se pun pastele nefierte, exact din ambalaj, pe fundul unei oale. Se adaugă ceapă peste (o ceapă tăiată felii), se adaugă un bol de roșii cherry tăiate în jumătăți, apoi se pune usturoiul, tăiat foarte subțire în felii. Se piperează totul cu piper negru măcinat, se adaugă două lingurite de sare pe deasupra și se adaugă și piper roșu, dacă doriți, după gust.
Se pune în oală o cană de apă, apoi se adaugă verdeața. Se pune totul pe aragaz pentru 11 minute la nivel maxim. Amestecați constant și veți observa că ingredientele vor începe să se înmoaie și să capete imediat o minunată aromă. Pregătiți-vă parmezanul și uleiul de măsline pentru a decora pastele și așezați-vă musafirii sau familia la masă.
Poftă bună!
Sursa articol: perfect-ask.com
Sursa video: youtube.com
Încălzire cu costuri zero: Cum se construiește un panou solar din cutii de bere
Costurile încălzirii pe timp de iarnă sunt o povară pentru mulți fermieri, mai ales pentru cei care doresc să asigure animalelor un confort termic chiar și când afară este ger și pe timpul zilei. Mai mulți cititori ne-au semnalat că ar fi recomandat să căutăm și să scriem despre metodă pe care ei au văzut-o aplicată la vecinii unguri, respectiv panoul solar din cutii de aluminiu, de conserve, de bere sau de suc.
Sistemul de încălzire cu panoul solar din cutii de bere este simplu de construit, putându-se folosi materiale pe care mulți dintre gospodari le au prin curtea din spate sau prin șopron. Astfel, este nevoie în primul rând de o casetă de lemn, apoi de un placaj pe care să se fixeze cutiile, de o sticlă sau de un plexiglas și de vopsea neagră mată.

Un astfel de panou pentru încălzire poate fi realizat în doar 10 ore, spune un site cu sfaturi și instrucțiuni și care oferă și o listă cu materiale necesare:
– O ramă de geam vechi sau, preferabil construirea unei casete din lemn – dimensiunea ei va determina și numărul necesar de cutii de aluminiu. În imagine s-a folosit o ramă de 120 m X 60 cm, pentru care sunt necesare 72 de cutii goale de bere sau de suc
– 4 placaje, dar care să nu fie din lemn de plop sau de pin
– Izolație pentru placaje – carton
– Spumă izolatoare
– Un tub pentru aerisire
– O bucată de plexiglass sau de sticlă
– Bandă adezivă (pentru asamblare și ultimele finisări)
– O placă de pal
– Vopsea neagră sau spray
– Un ventilator de la un computer
– Gură de aerisire
– Suruburi și cuie
– Unelte.
Prima etapă este colectarea cutiilor de aluminiu pentru că vă puteți apuca de proiect doar atunci când aveți suficiente. Ele trebuie să fie complet goale, în stare bună – neîndoite, găurite sau crăpate.
Se recomandă ca pe parcurs ce adunați cutiile, să le sablați suprafața (poate folosind șmirghelul) pentru ca vopseaua neagră să se prindă mai bine.
Cutiile trebuie să asigure circulația aerului, așa că se taie un capăt și celălalt se găurește cu ajutorul unei bormașini. Apoi se fixează pe rânduri în caseta de lemn.
La capătul casetei, pentru fiecare rând de cutii se face un orificiu care apoi se acoperă cu o plasă pentru a limita intrarea prafului, dar pentru a permite aerului să circule.
La celălalt capăt al cutiei de lemn se face un orificiu în placaj și se fixează un ventilator de calculator, conectat la o aerisite. Pe aici va ieși aerul cald pe care ni-l dorim în miez de iarnă, produs cu ajutorul energiei solare, fără nici un cost! De fapt, aproape nici un cost, pentru că micul ventilator trebuie să aibă o sursă de energie electrică, însă prețul energiei poate fi considerat zero dacă luăm în calcul că aceeași energie o folosim la calculator acum, când citim acest articol 


Iată un video (în limba engleză) care arată pas cu pas cum se construiește un panou solar cu cutii de conservă
Sursa video: youtube.com
Sursa articol: agrointel.ro
Build your own electricity-producing wind turbine
Among the sources of clean and renewable energy, wind energy is one of the most viable ones being that is is easily obtained anywhere. To produce energy from the wind, all that is needed is a generator, which will transform mechanical energy from the moving blades into electricity. Wind power is plentiful, renewable, widely distributed, clean, uses little land, and produces no greenhouse gas emissions during operation, reducing pollution of ecosystems and the irreparable damage that leads to exploitation of fossil fuels like coal, gas or oil.

To build your own wind generator you’ll need a car alternator, propellers and directional vane, mount and stand, and welding equipment. You can either purchase or create the propellers yourself, but if you choose to build them keep in mind that they should have a leading edge that is curved, so that passing air will force it away from the source. Then you must make sure they’re balanced – the blades should have approximately the same weight and their center of gravity must be centered.

Mounting several propellers to a rotating surface, then mounting a directional vane to the rear of the rotating wheel’s mount will turn wind energy into a mechanical force – the rear vane will point the propeller assembly at the wind source. Then you have to build a mount and stand to hold the alternator – you can use a wooden board, for example.

Connect the alternator to the propeller assembly by welding the alternator directly to the rotating wheel, or by welding a suitable automotive pulley to the wheel’s surface then driving the alternator with a belt, which allows easier maintenance.
In the following video you will see how you can build the alternator yourself:
Sursa video: youtube.com
Finally, mount the alternator onto the frame of the stand, below the propeller assembly. Once you have all the generator components fastened together, mount it on your pole or tower. Now that you’ve erected the wind generator connect the wires to your battery with a charge controller in between to prevent over-under charging.
 [Image source: www.windstuff.org]
SEE ALSO: 6 High-efficiency wind turbine models
Sursa: interestingengineering.com
35+ Awesome Food Hacks That Will Change The Way You Cook
If you thought you knew how to cook, or eat, you’re wrong. Here are 38 innovative food hacks that will revolutionize your cooking and make everyday food easy to make and total fun. Innovation was never this delicious!
If you thought you knew how to cook, or eat, you’re wrong. Here are 38 innovative food hacks that will revolutionize your cooking and make everyday food easy to make and total fun. Innovation was never this delicious!
01. Bacon Cinnamon Roll

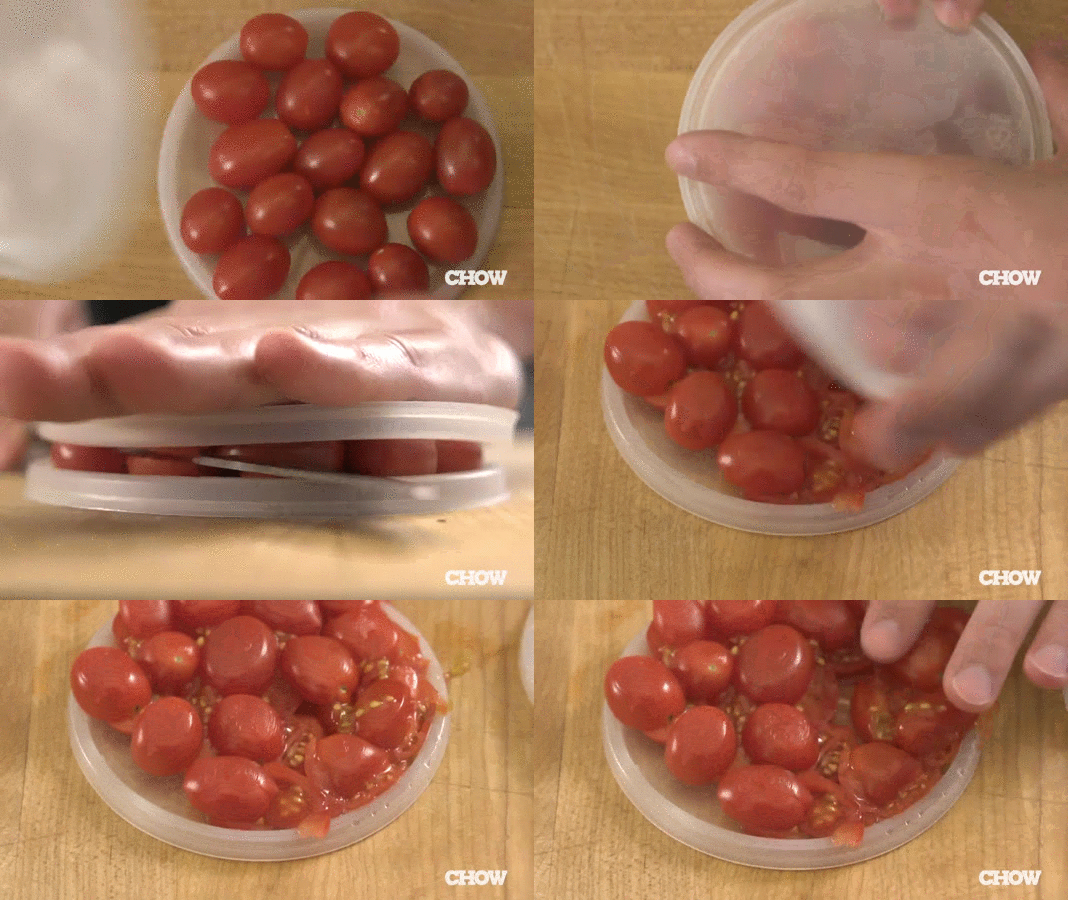
02. Cut small foods easily
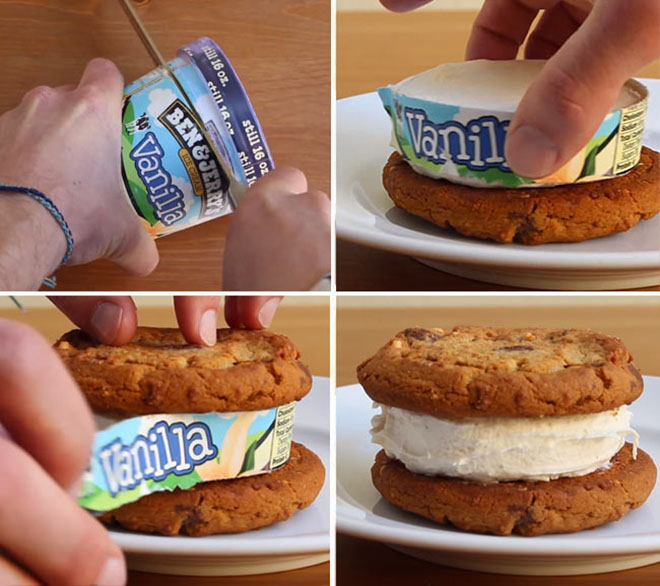
03. Perfect ice cream sandwiches every time
04. Dental floss can perfectly cut soft solids

05. Easy cheese sticks
06. Chocolate cream hack
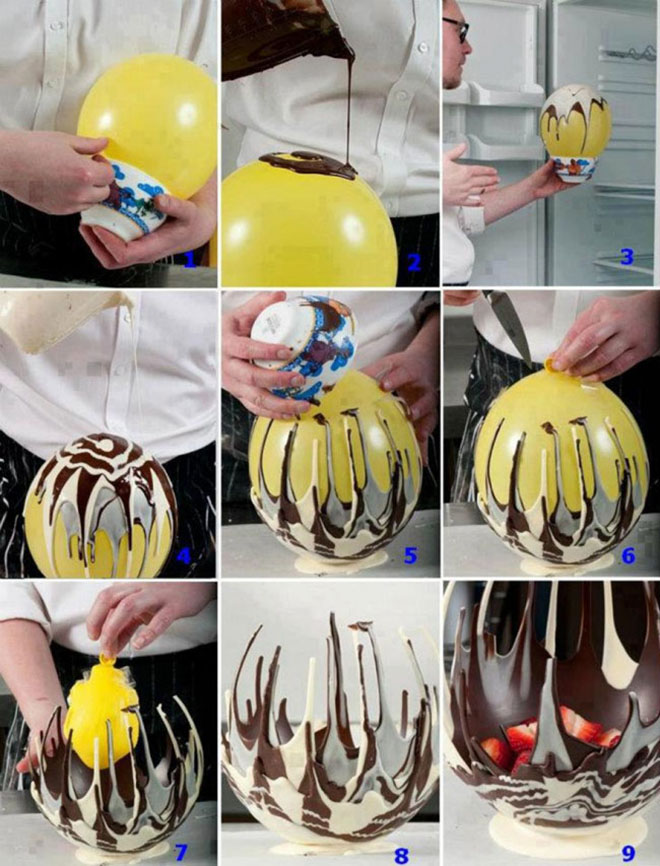
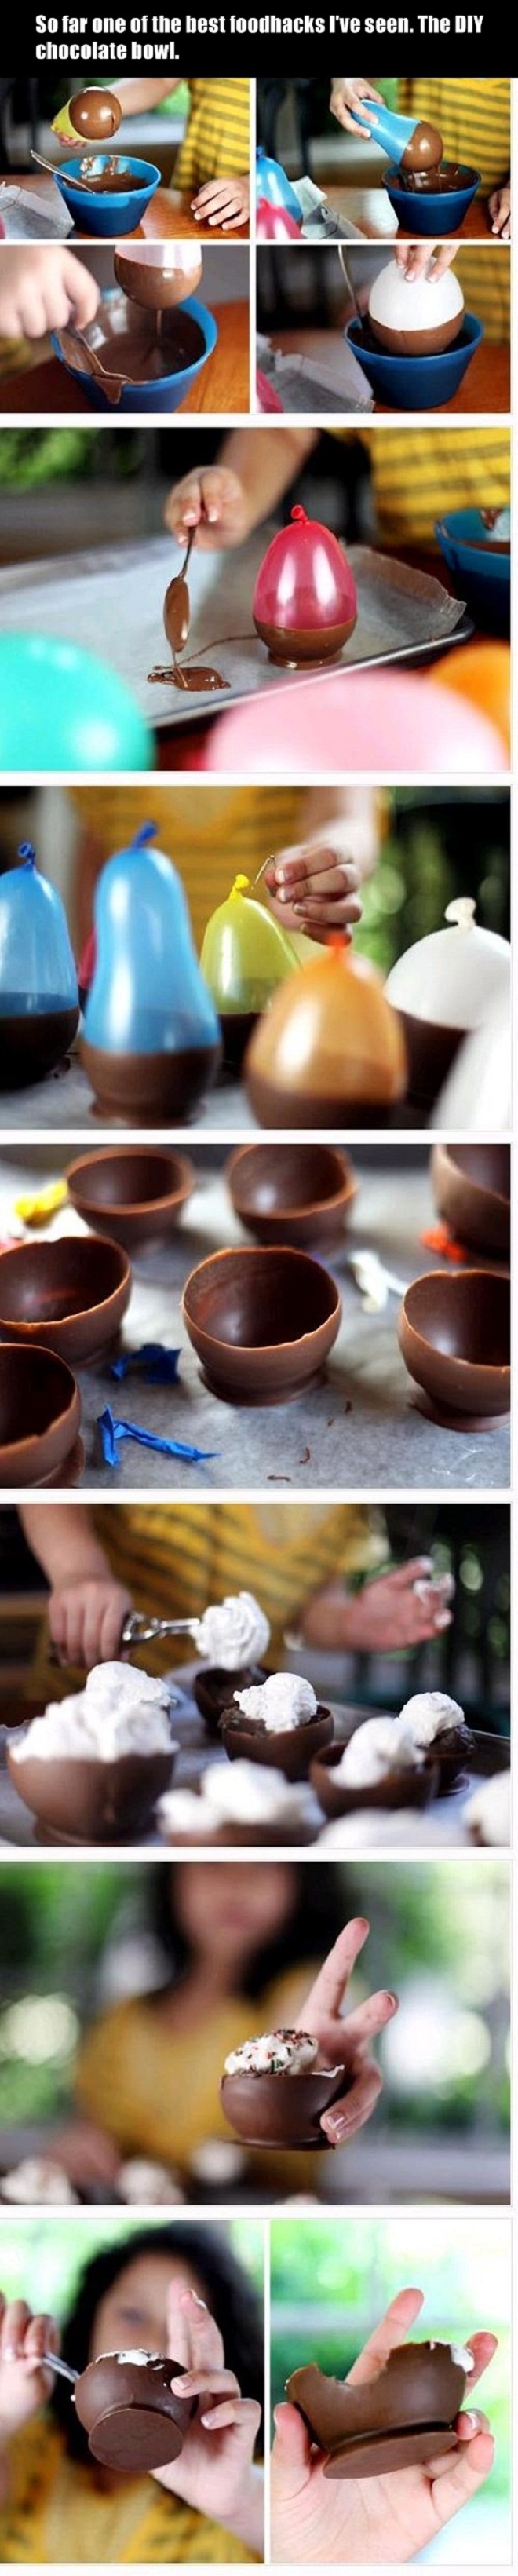
07. Use a balloon to shape a chocolate bowl
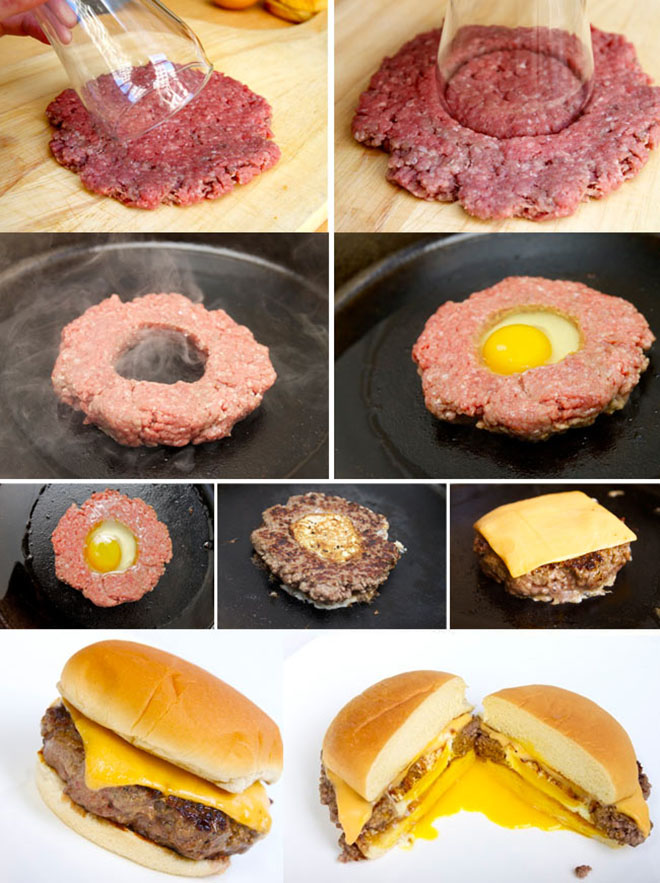
08. The perfect egg burger
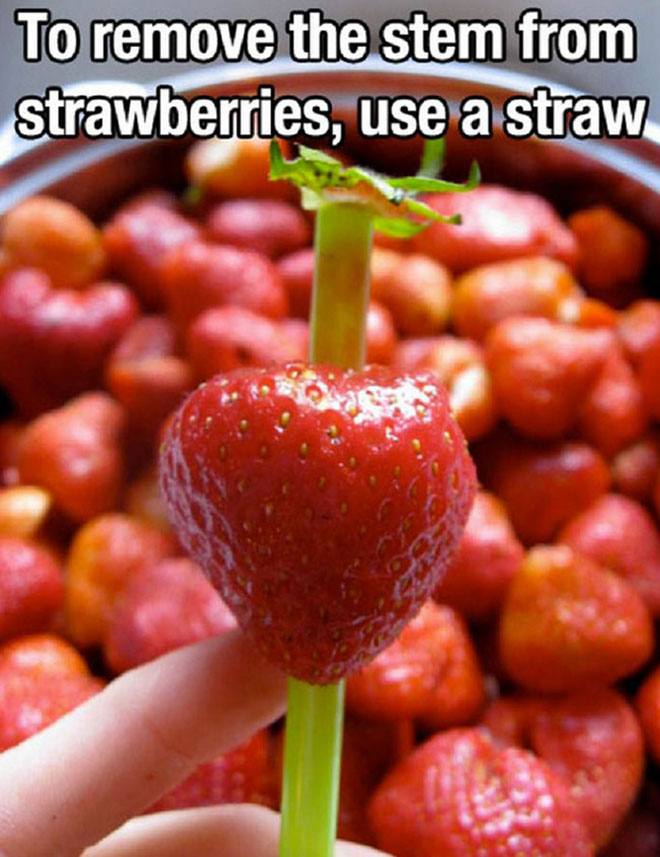
09. An easy way to remove the stem from a strawberry
10. Easy chopsticks
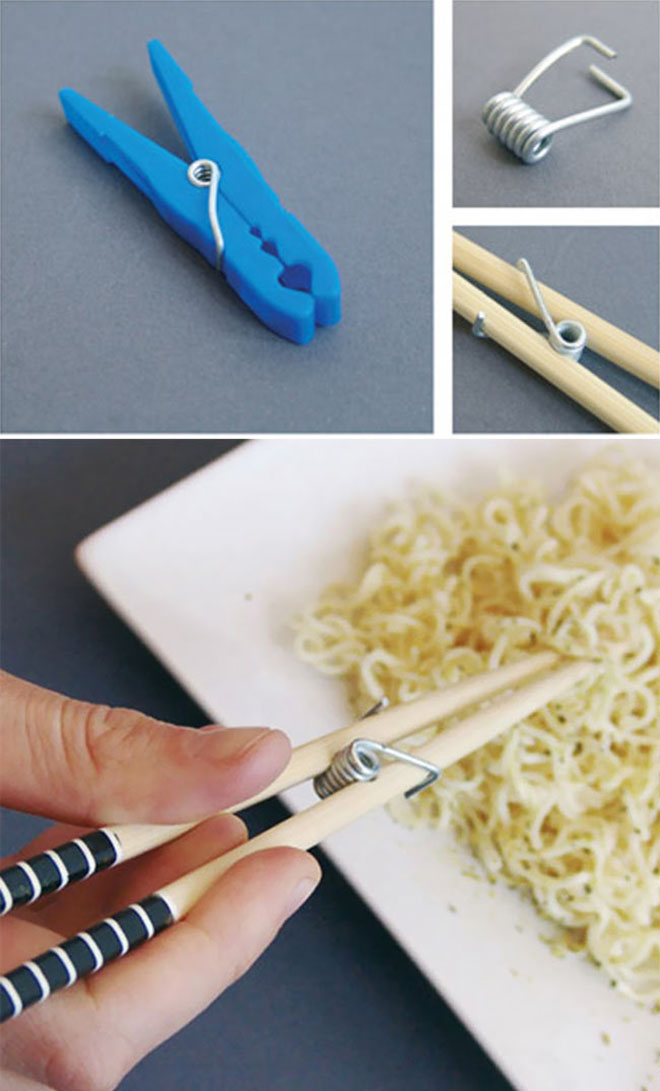
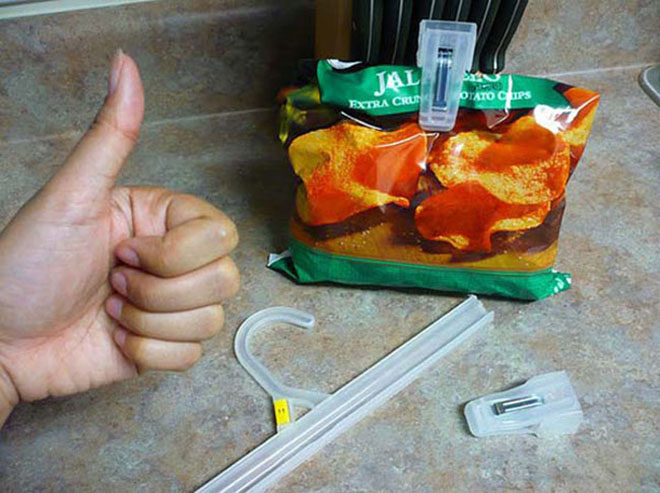
11. Use your cheap hangers as clips
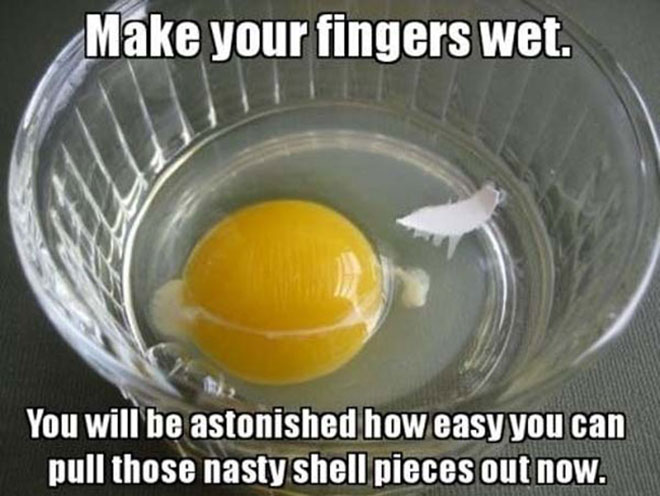
12. Wet your fingers before removing pieces of eggshell
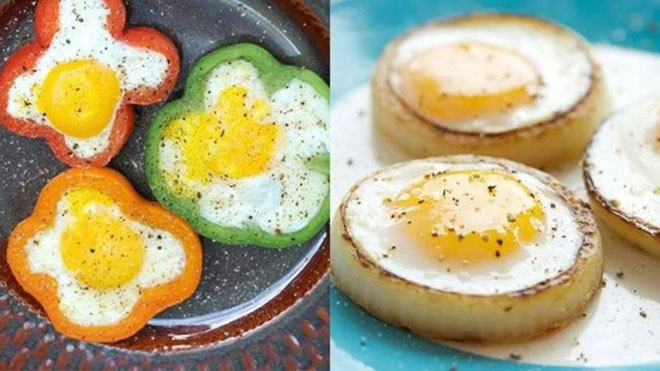
13. Here’s a brilliant breakfast idea
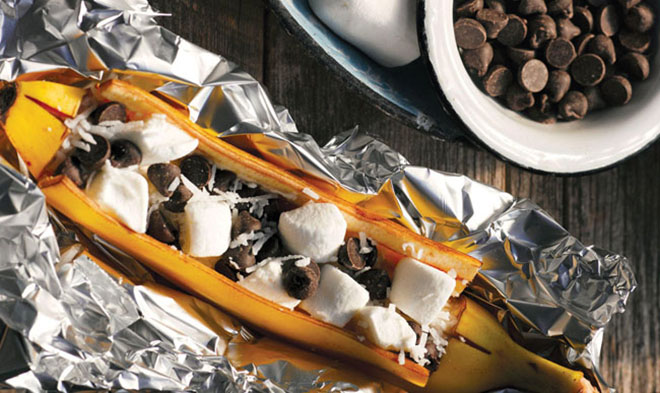
14. Melted banana split
15. Hold your taco with a fork

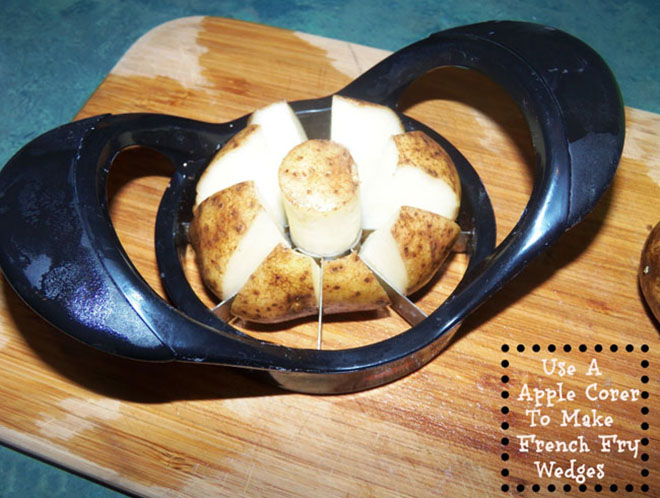
16. Use a apple corer to make french fry wedges
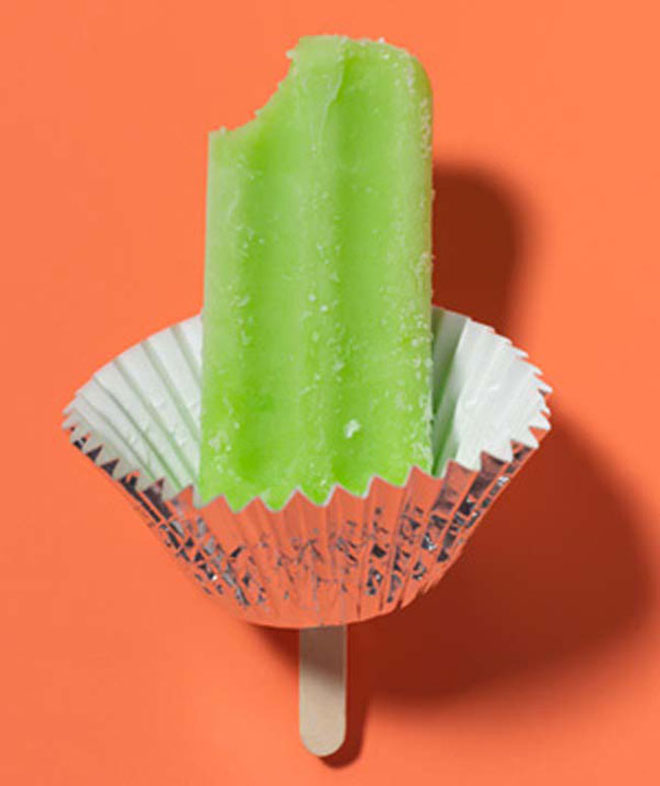
17. Goodbye sticky hands
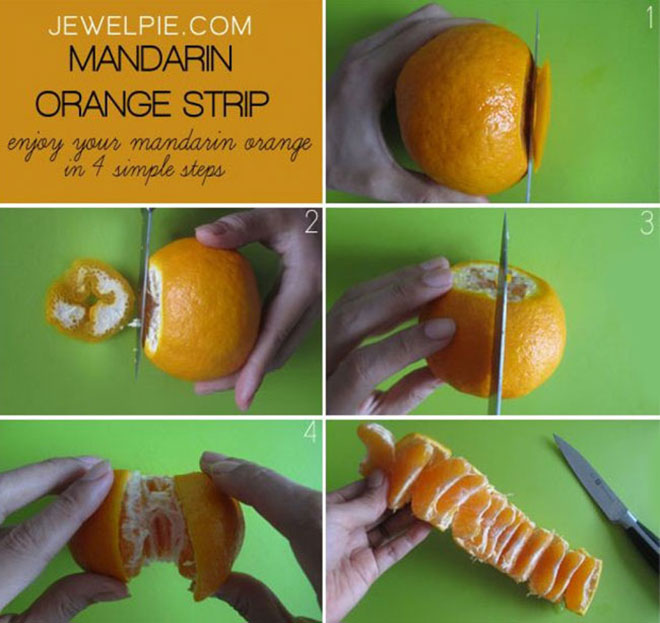
18. Mandarin orange strip
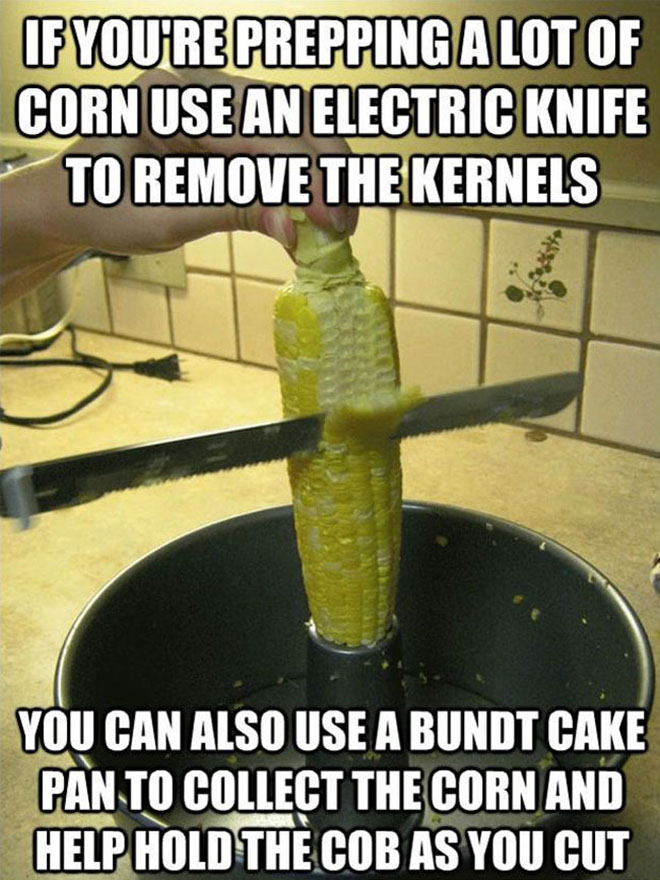
19. Use an electric knife to remove the kernels
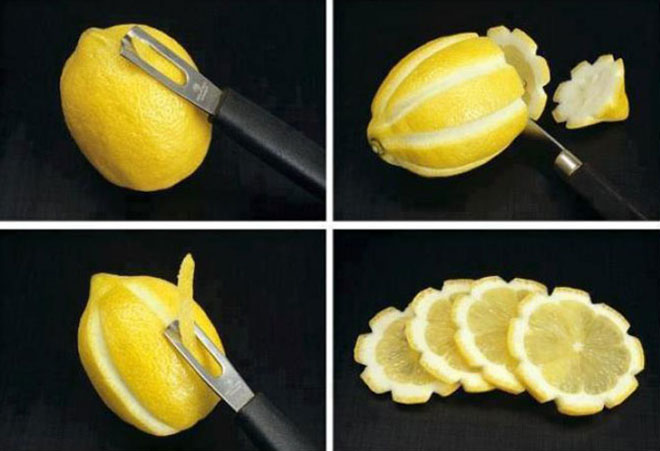
20. Lemon flowers
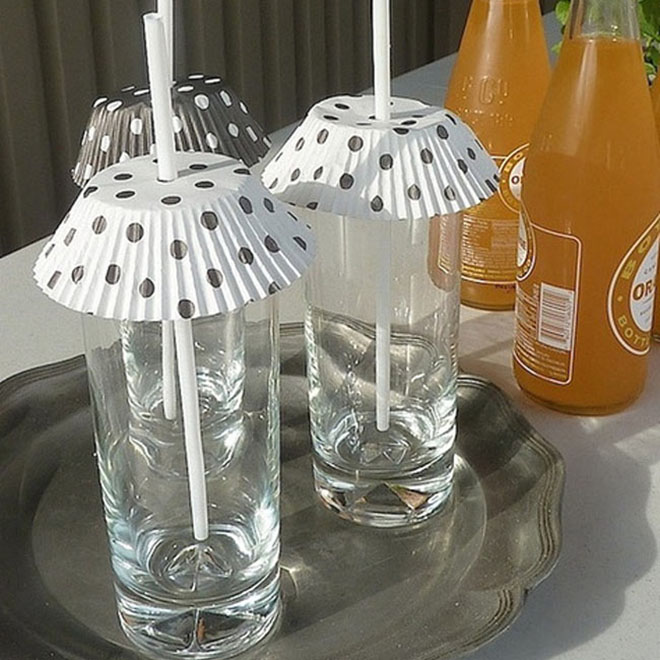
21. Summer covers for your drinks
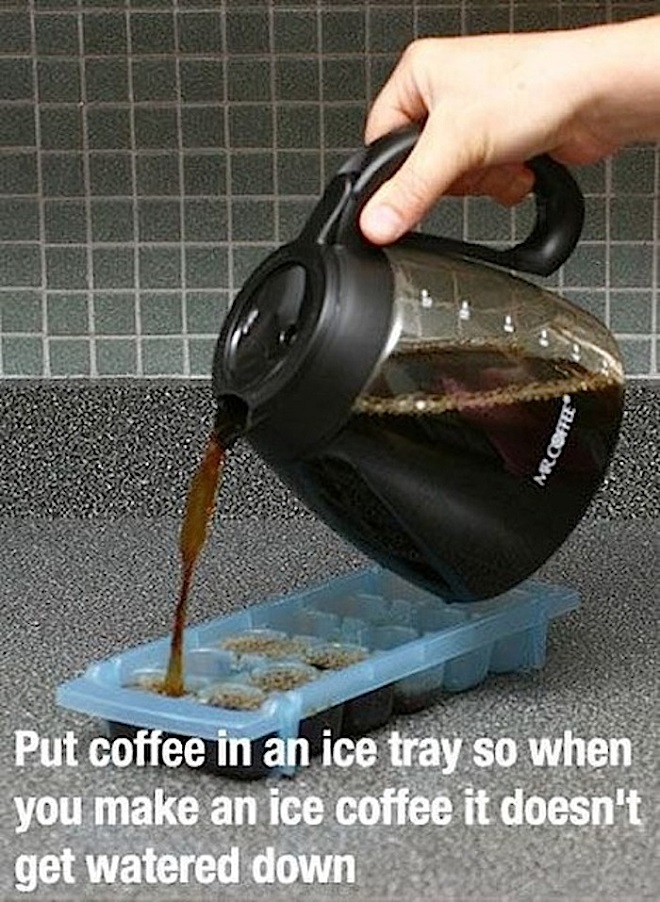
22. Coffee ice cubes
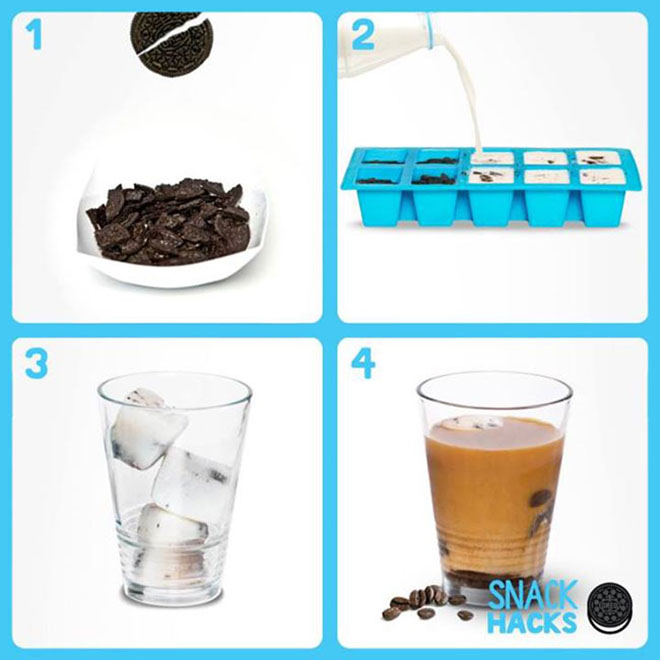
23. Milk and cookie ice cubes
24. Bacon pancakes

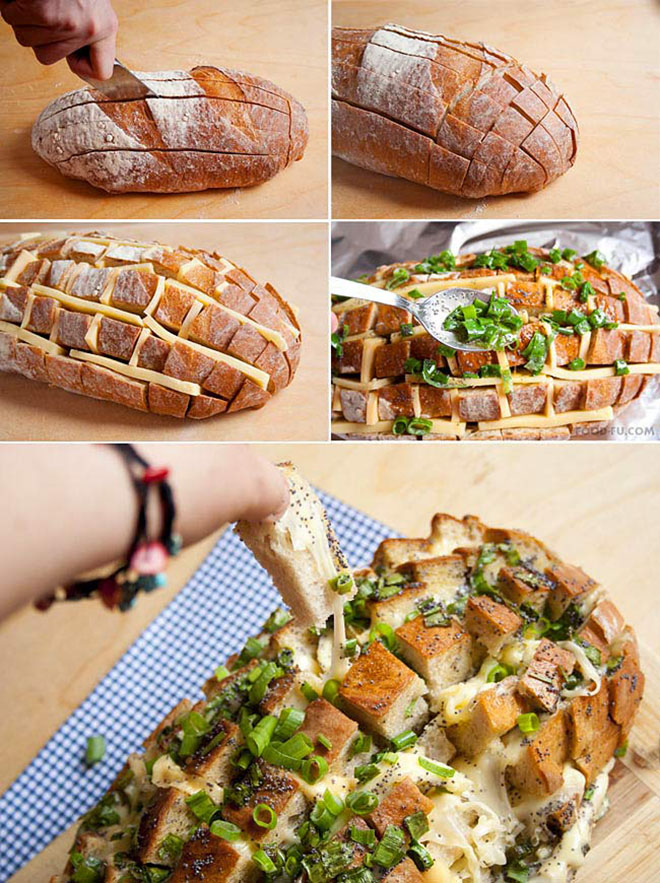
25. Cheesy bread hack
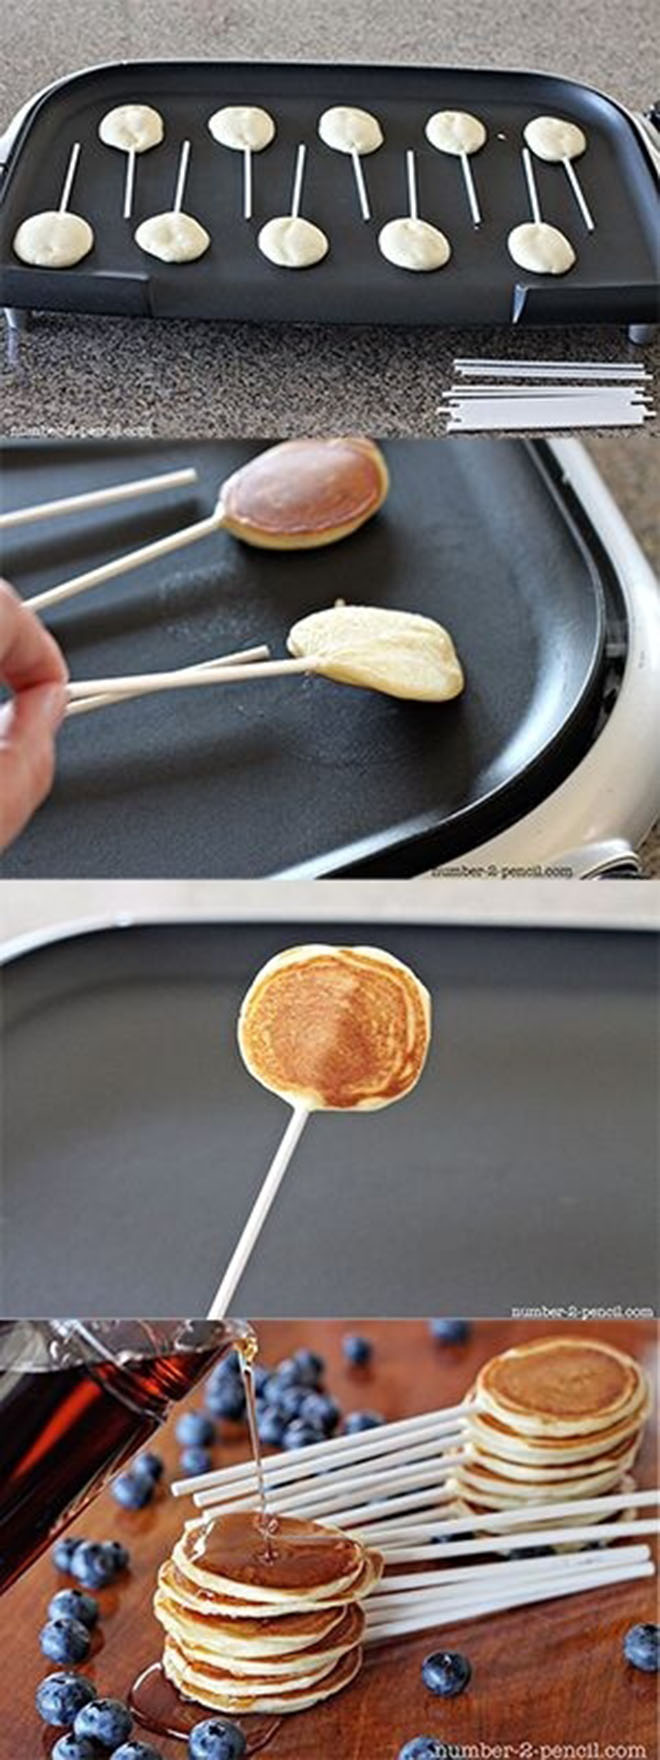
26. Pancake pops
27. Use an empty ketchup bottle for your pancake mix

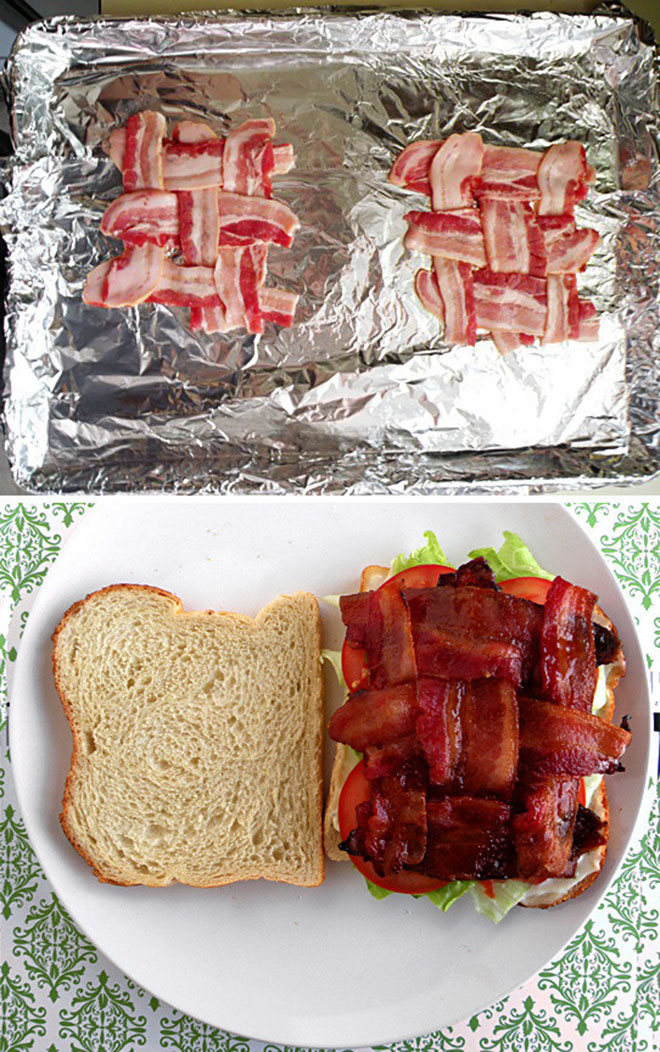
28. BLT sandwich
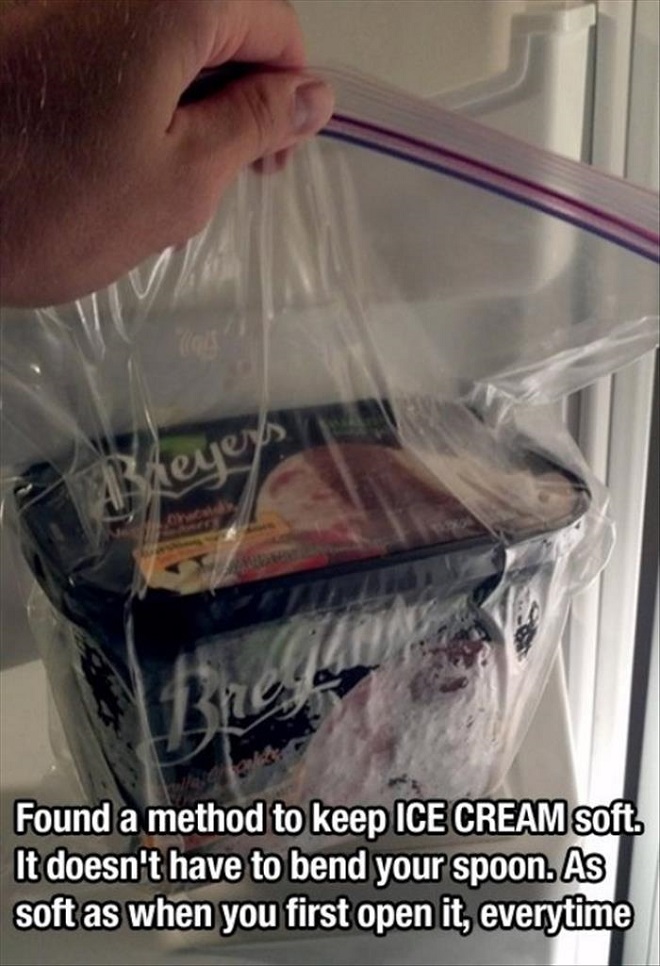
29. Ziploc bags will keep ice cream soft
30. Easy pancake art
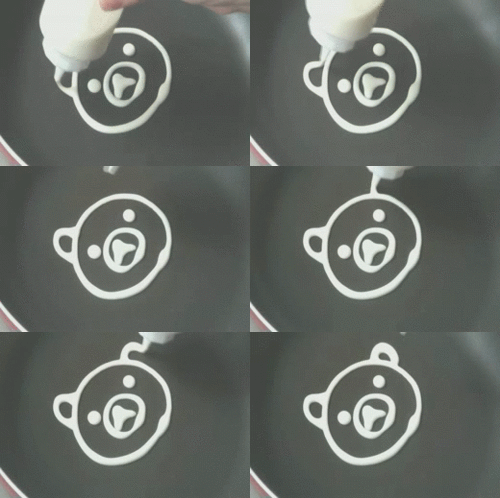
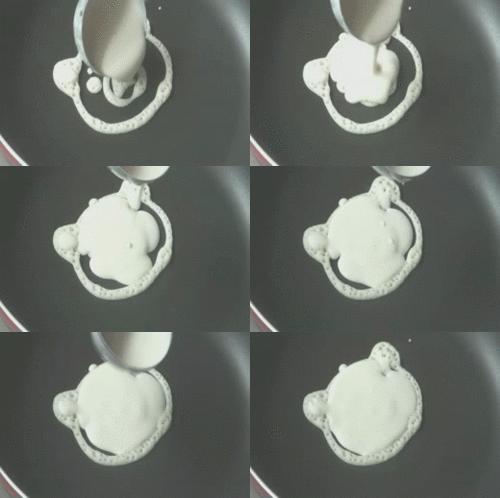
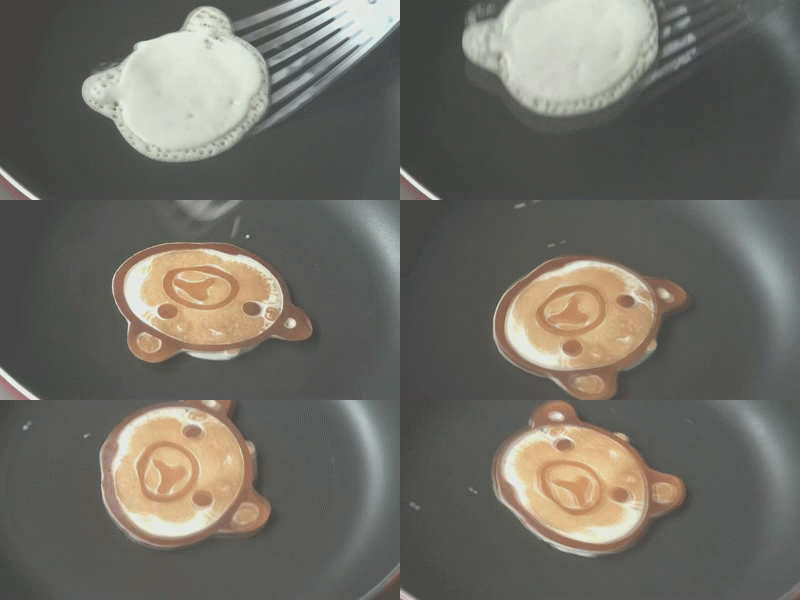
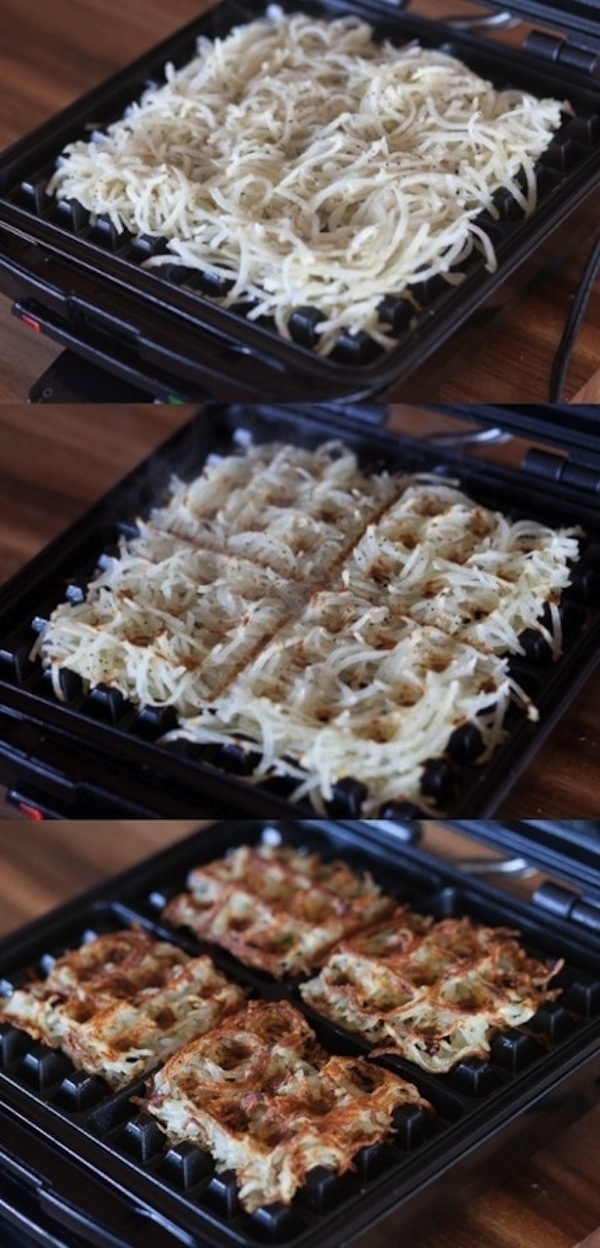
31. Use a waffle iron for hashbrowns
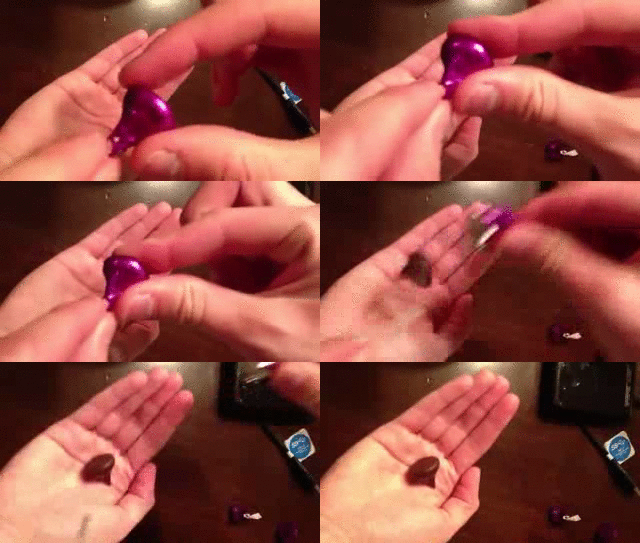
32. How to open a chocolate kiss
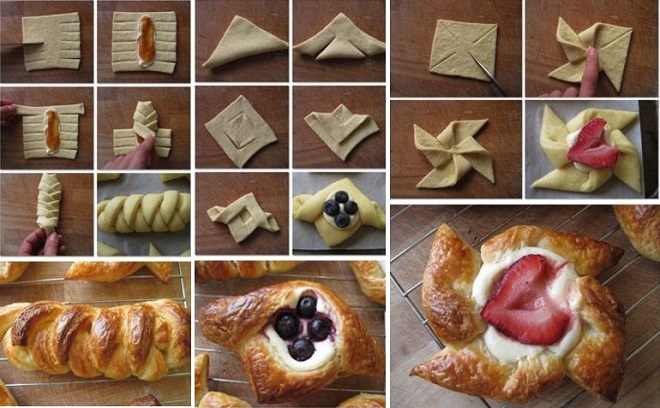
33. Pastry folding hacks
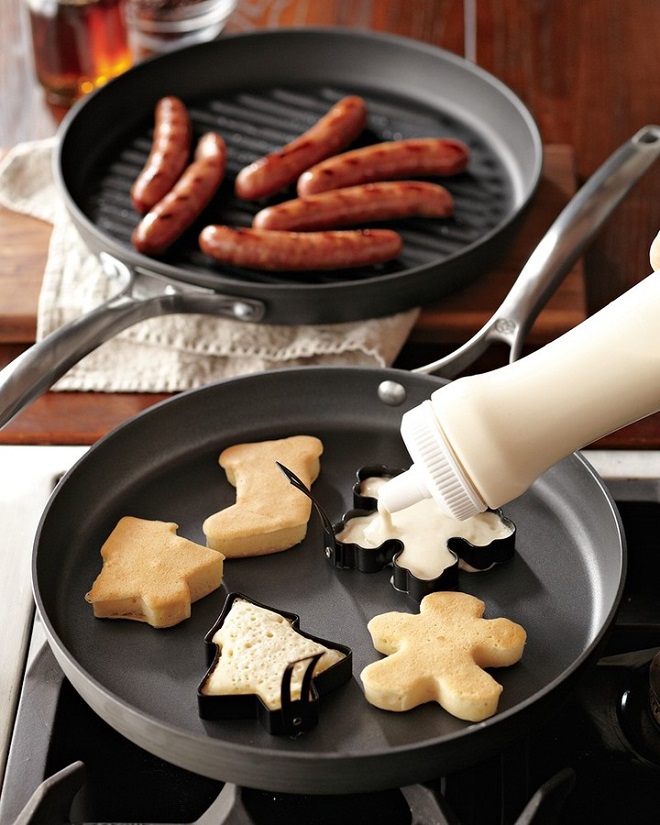
34. Use cookie cutters for creative pancakes
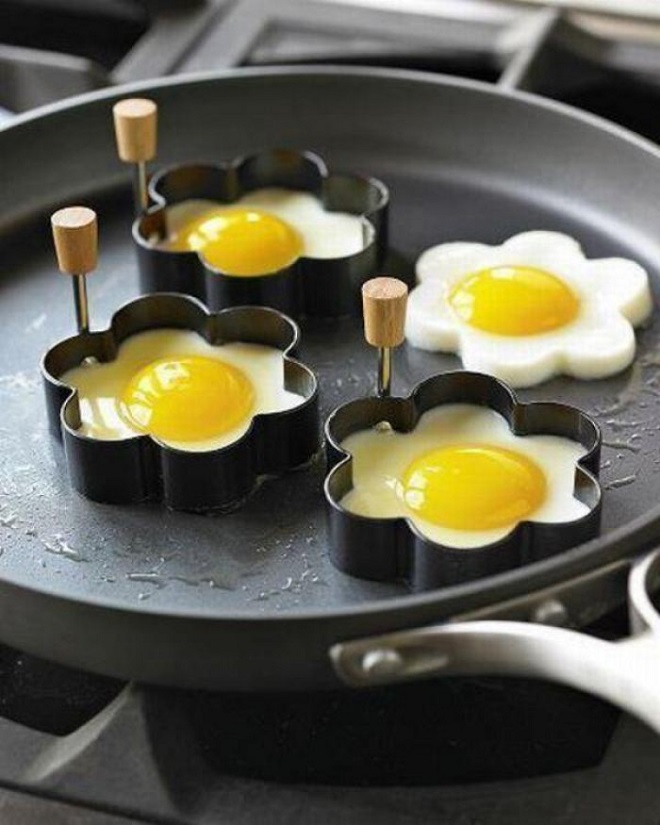
35. The same can be done with eggs
36. Sprinkle decorations

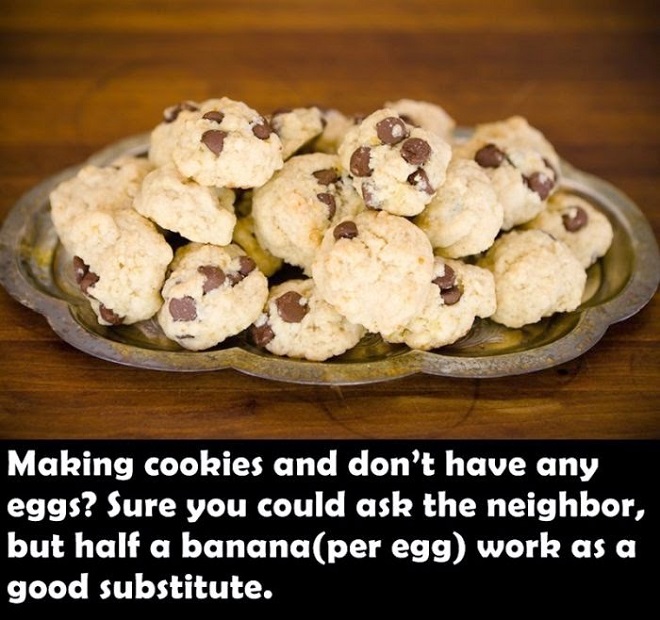
37. Bake cookies with bananas if you run out of eggs
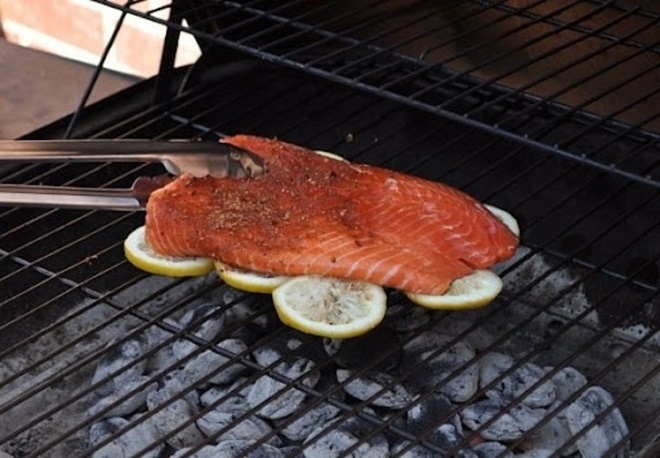
38. Grill fish on lemon slices to prevent it from sticking to the grill and add some extra flavor
Share these delicious food hacks with others below!
Sursa: architecturendesign.net
Scapa usor de grasimea de pe abdomen, cu acest exercitiu extraordinar, numit „aspiratorul de grasime”!
Un articol de Maya
Abdomenul plat si ferm a fost cu siguranta pe lista dorintelor din 2016 in cazul multor persoane. Cu siguranta te intrebi cate abdomene ar trebui sa faci ca sa ajungi la rezultatul dorit. Noi avem vesti bune pentru tine! Te putem invata o tehnica simpla ca sa reduci grasimea abdominala in nici mai mult de 2 saptamani. Daca vei combina aceasta tehnica cu exercitiile obisnuite pentru abdomen, vei obtine o talie sculptata!
Majoritatea persoanelor recurg la nenumarate tipuri de exercitii CITESTE IN CONTINUARE
12 Nail Shapes You Need To Try Right Now
Just when you thought you had a solid grasp on the nail industry, this article gets shoved in your face. Don’t worry, you’re not alone! I had no idea there were so many different nail shape possibilities. When it comes to anything related to nails, I’m as vanilla as you can get. Most of the time, I sport a natural, bare nail look, and if I manage to find time to slap on a coat of polish, it’s one simple, traditional color. I certainly learned a thing or two from this article, and I hope you will too!
1. Round
This nail shape works best for those of you wanting to keep your manicures short. One of the benefits of a round tip is it’s harder to chip because there aren’t any ridged edges to catch on things.

via Instagram / @nailsbycapps
2. Square
This is a very common, popular style that is perfect for French manicures. It works best for individuals looking to maintain a medium or long nail length.

via Instagram / @lefthandgyrlnails
3. Stiletto
Anyone wishing to elongate shorter fingers tend to gravitate toward this style. These nails are insanely long, and not very practical, but if you can rock it, go ahead and do so!

via Instagram / @kims_nailpage
4. Almond
Like the Stiletto shape, Almond nails lengthen and slenderize fingers. However, because this look requires extensive filing along each side of the nail, it is a very weak shape and can easily break.

via Instagram / @hand_bananass
5. Squared Oval
Also known as the „Squoval„, this shape is the most flattering one of them all. Pretty much anyone can pull off this look!

via Instagram / @benailed_on_facebook
6. Ballerina
This shape is sometimes referred to as „Coffin” and is basically a Stiletto nail with a squared tip. The tip gives the shape its name because it looks like a pointe shoe.

via Instagram / @barukhbeautysalon
7. Mountain Peak
The difference between this style and Stiletto is the length. Mountain Peak nails are much shorter than Stiletto, making them a bit easier to wear.

via Instagram / @craftyyyy_nails
8. Flare
Another name for this nail shape is „Duck Feet”. Believe it or not, many nail techs refuse to do Flare nails because the look they create is the exact opposite of what many of them were trained to do. It’s viewed as an industry no-no and goes against nail sculpting standards!

via Instagram / @chicnailbar
9. Lipstick
This look is best achieved through acrylics. The tip of the nail is shaped to mimic the slanted top of lipstick.

via Instagram / @harlowvanityparlour
10. Oval
If your nail bed is wide and narrow, this is a great option for you. Oval nails combine the positive elementsof Almond, Square, and Round styles, making them strong and pretty.

via Instagram / @benailed_on_facebook
11. Arrowhead
This nail shape resembles exactly what you would expect: an arrowhead! A file is used to create straight sides that then sweep sharply into a v-shaped point.

12. Edge
This final style resembles the Arrowhead shape, but is MUCH longer. It’s quite unconventional, to say the least, and can’t be worn by everyone.

via Instagram / @lisapetkin
Main image via Instagram / @chicnailbar
Collage image via tumblr / ashmeadowmelts
Sursa: diply.com
15+ Cool Things You Didn’t Know You Could Do With Google
Who knew you could use Google to play Lego? (H/T this Imgur post).
1. Translate symbols or characters by drawing them.


If you go to Google Translate, there’s an option where you can manually draw things like Chinese characters, which will then be translated for you into English.
2. Get a calorie comparison of your favourite foods.

If you google “[food] vs [food]” then a chart will appear comparing the nutritional value of the two choices in great detail – everything from calories to the amount of magnesium.
3. Set a timer.

If you Google any amount of time, followed by “timer”, you’ll get a countdown, and you can even make it sound an alarm at the end – perfect for use in the kitchen.
4. Tackle geography trivia.
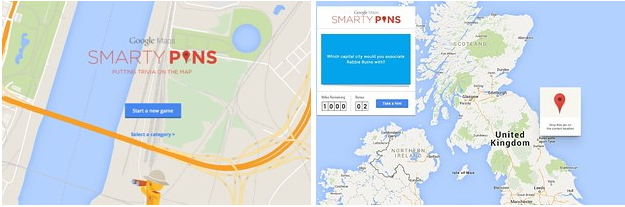
Using the new Google Maps tool Smarty Pins, you can take on Google in a geography trivia game in which you will be asked questions with location-based answers, and you will answer by placing a pin in the world map. You can try just general knowledge or tackle specific categories like science or sport.
5. Split a bill and calculate the tip.

End the struggle of paying the pill at the end of a group meal by googling “tip calculator”, entering the full cost, the percentage you want to tip, and the number of people, and it’ll work out exactly how much you need to pay each. Easy.
6. Filter your Gmail.

If you add “+anything” to your Gmail address it will still work, which means you could sign up to certain websites using your email+websitename@gmail.com and create a folder that all emails from that site automatically go into.
7. Discover how popular different words are.

Using the Google Ngram viewer, you can search more than 5 million books published between 1800 and 2008 to find out how often different words were used, and then compare them on a graph. TIL: For a brief period in the 1830s, elephants were more popular than cats.
8. Play zerg rush.

Another bit of proof that Google just does not want you to do your work. Destroy the Os by clicking on them before they destroy the rest of the page (and try not to give yourself finger cramp in the process).
9. Find and download loads of cool fonts for free.

If you go to Google Fonts, there’s a huge collection of completely free fonts you can use. You can either download them to your computer or make them the default font in your browser.
10. Learn how to pronounce massive numbers.

If you search a number up to 12 figures followed by “=english”, Google will tell you how to pronounce it.
11. Plan your wedding.

Yep, Google even has a comprehensive wedding planner to make sure everything is in place for your special day. It’ll help you do everything from announcing the news of your engagement to finding a venue, making a budget, creating a schedule and guest list, setting up a shareable photo stream from the day, and even making an entire website to keep everything in one handy place.
12. Easily find out the week’s football fixtures.

Simply google the name of the league and you’ll get a list of all the week’s fixtures right there at the top.
13. Play Atari Breakout.
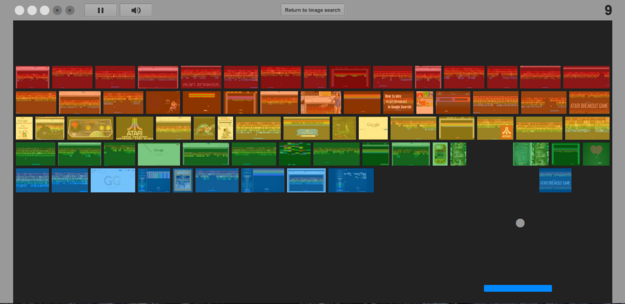
Simply search “Atari Breakout” on Google Images and that’s your productivity dead for an hour.
14. View art from galleries all over the world.
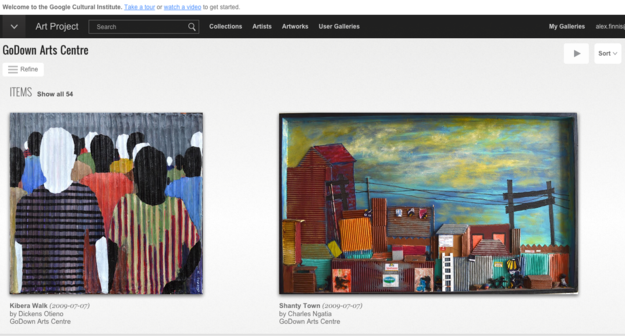
Google Art Project lets you view super–high-quality photos of artwork from nearly 600 international galleries. Why bother even leaving the house?
15. View and play all the old doodles.

Bu hitting “I’m feeling lucky” without anything in the search bar, you’ll be presented with a catalogue of all of Google’s old doodles and games back until when they started in 1998 (including the brilliant Pacman game).
16. Explore the universe.

Google Sky uses images from the Hubble Telescope and NASA Satellites to let you delve into the far reaches of our universe. You can explore galaxies millions of light years from Earth, learn about astrological signs, and even listen to space-related podcasts.
17. Take a journey through Middle-earth.

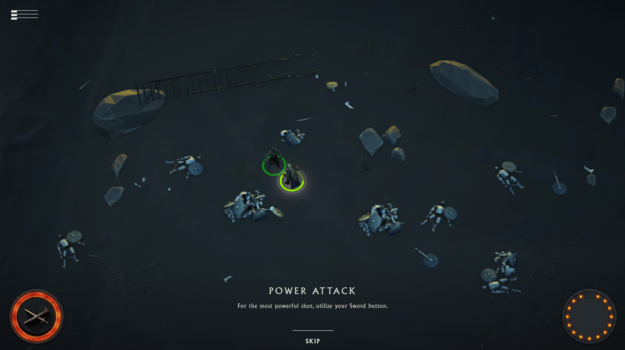
This hugely interactive site was set up by Google to celebrate The Hobbit films and lets you play your way through five famous battles, follow the stories of your favourite characters (including clips from the films themselves), or simply explore the map itself.
18. Play with Legos.
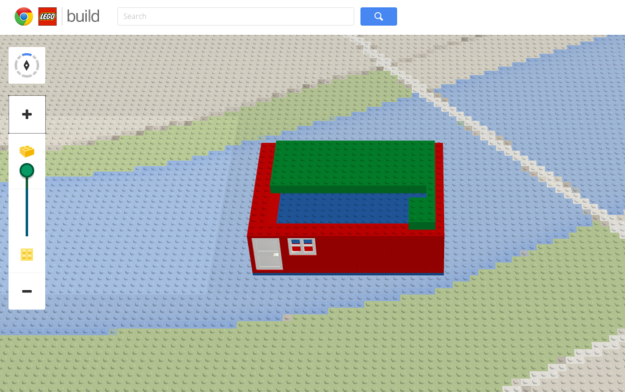
Feel like a kid again by going to buildwithchrome.com. You can put up constructions all over the real world using its map function, check out cool stuff other people have already built, or learn to become a master bricklayer with Build Academy.
Sursa: architecturendesign.net